


Presenting a low-carb, gluten-free, and vegan bharwan Mirchi recipe that is super easy to make and tastes delicious. Packed with protein (chickpea flour), a little bit of lemon juice, and a hint of aromatic Indian spices, these peppers are just perfect for a busy weeknight and will complement any main course beautifully.

What is Bharwan Mirchi?
So “Bharwan Mirchi” literally means stuffed peppers. Now, stuffed peppers are a dish that’s popular worldwide and can be made in several ways. But what I like most about this recipe is that it’s –
- Healthy and nutritional
- Made with pantry staples
- Comes together in 30 minutes
- Keeps well in the fridge; therefore, it can be made ahead of time!
The best part is that, this bharwan mirchi can be doubled to suit your preferences, and this recipe makes a decent amount that you can easily pack for lunch the next day.
So let’s head out, buy some peppers, and start stuffing!

Ingredient list for Bharwan Mirchi recipe
The ingredients to make my favorite bharwa besan mirchi sabzi are probably in your pantry. This part explains the role of each element in this recipe. Please scroll down to the bottom of this post for the FULL, printable recipe card.
Big Green Chilies — I have used light green sweet peppers for the bharwan Mirchi recipe. These peppers are called Cubanelles and are considered sweet pepper. But you can use any colored long peppers that are sweet tasting for this recipe.
Chickpea flour — Since these Bharwan Mirchi’s are gluten-free, I have used chickpea flour as my stuffing. But you can choose from a couple of choices – you can stuff bharwan Mirchi with boiled, mashed potatoes (also known as bhareli Mirchi) or rice for a change. Either one of them will work well.
Spices and seasonings — Aromatic spices like amchur Powder (mango powder), coriander powder, fennel seeds powder, degi mirch or red chili powder, a pinch of hing (asafoetida), Rai (mustard seeds), Haldi (turmeric powder), garam masala powder, cumin powder, and salt gives a hot and spicy flavor to this bharwan mirchi recipe.
Oil — to cook chilies.

Rajasthani Bharwan Mirchi Recipe Tips
Slit in Mirchi — Be careful while making a slit; we have to make a slit on one side; the other side should remain intact.
Spice level — This bharwan Mirchi recipe is moderately spicy. However, the spiciness can be altered by adding or reducing the amount of spices. You can start with a few teaspoons and increase their quantity as desired.
Water Addition — The chickpea and spice stuffing after it is cooked is crumbly and will fall off during cooking. So to keep the filling intact in the peppers, a little moisture is added to hold its shape. After adding water, the chickpea mixture should form a softball. This stuffing mixture can go from a softball phase to a paste-like texture in a few drops. Therefore, be careful and add water or yogurt ( thick curd) slowly.
Best Pan — A cast-iron pan is the best. Bharwan Mirchi turns out becomes golden and turns out much crispier in a cast-iron pan.

Cover the pan — By covering the bharwan Mirchi tightly with a lid will ensure evenly cooking. The moisture in the peppers will evaporate into steam but still stay in the pan and help the peppers cook thoroughly. This way, the mirchis will have a delicate texture, and the chickpea filling will retain its moisture.
Season Peppers — As kids, we used to eat the stuffing and discard the pepper skin because it tasted bland. So my mom started to sprinkle the inside of the peppers with salt before stuffing them. It makes a huge difference!
Check for doneness — To check if bharwa besan mirch sabzi is cooked, insert a fork in the pepper, and if the fork goes through easily, your Bharwan Mirchi is cooked. If you are skeptical about the doneness of the mirchi, allow them an additional 5 minutes until they are well cooked through.
Slice peppers — If your mirchis are big, you can cut them in half or quarters to suit your preferences.
Cook in Airfryer — The same recipe can be baked in an airfryer @300°F for 10-12 minutes until they are golden. Remember to turn the mirchi halfway during the entire cooking time to ensure even cooking. It should be noted here that every air fryer is different, so their cooking time may vary.
Can Bharwan Mirchi be made ahead?
Yes! There are two ways you can make this bharwan mirchi recipe.
Partial Prep – The stuffing can be prepared two days in advance (do not add water). Cool and store in an airtight container. When ready to assemble-
- Rinse and pat dry the peppers,
- Make a slit,
- Deseed,
- Add water and knead the stuffing
- Stuff the peppers with the filling, and
- Cook as directed.
Fully Cooked – Cook the Rajasthani bharwan mirch as stated in the recipe. Allow them to cool, then store them in the refrigerator for 3-4 days in an airtight container. When ready to eat, warm the mirchis in the microwave for 30 seconds to a minute until heated through.
SUBSTITUTIONS & VARIATIONS
There are many variations and substitutes possible with the stuffing. Instead of stuffing the bharwan Mirchi recipe with chickpea flour and spices ( as mentioned in this recipe), some other great options are –
- Pizza -like stuffing made with bell peppers, onions, sauce, and cheese
- Spicy rice filling
- Mozzarella stuffed peppers or
- Roasted chickpeas and quinoa stuffed peppers.

LET ME KNOW WHAT YOU THINK!
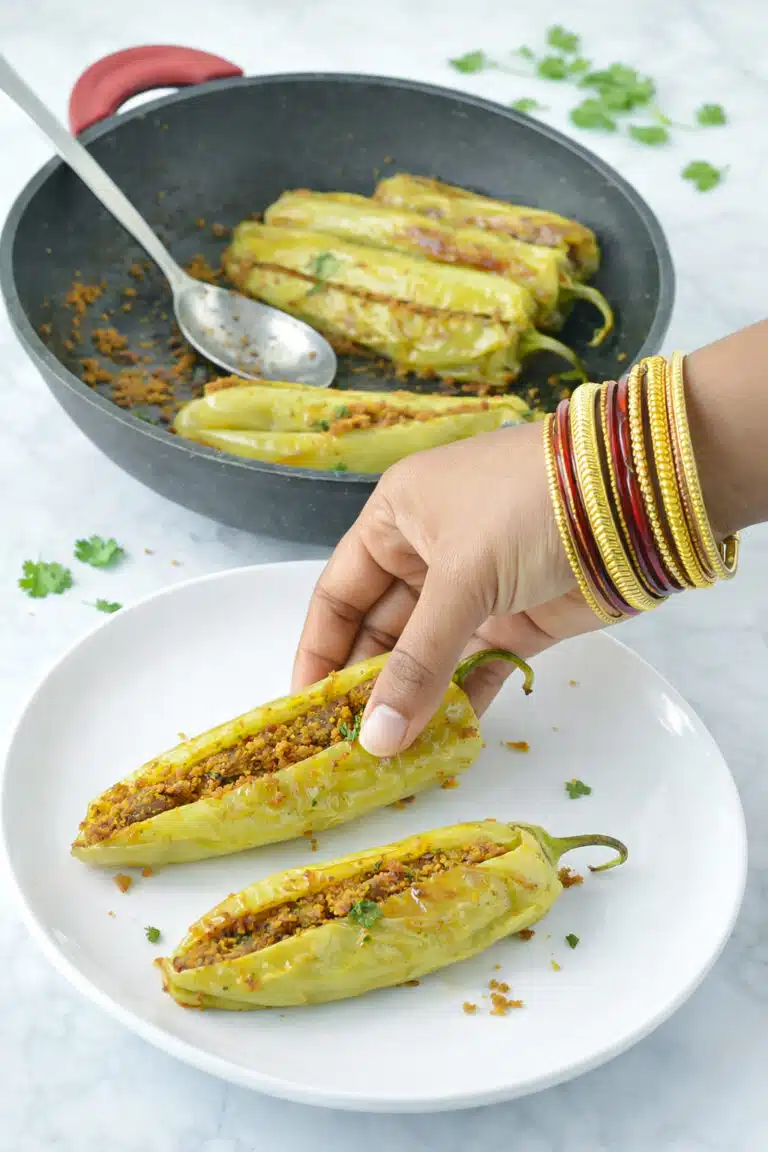
This bharwan Mirchi recipe is a perfect dish for everyday dinners but could be a super tasty appetizer for your next potluck party!
It can be served as an appetizer or as a side dish, but if you are looking for a few options to round up the meal, then here are some of my favorites pairings –
You can pick one of them to make make it a wholesome and delicious meal.
Should you make this bharwan mirchi recipe, please let me know your thoughts by sharing your comment below. And don’t forget to share it with your family and friends.
HUNGRY FOR MORE FAMILY-FAVORITE RECIPES, TRY THESE-
Follow the step-by-step instructions below to make the best Bharwan Mirchi Recipe

Bharwan Mirchi Recipe
EQUIPMENT
INGREDIENTS
- 6 medium Green Chilies
- ¾ cup Besan (Chickpea flour/ Gram flour)
- ½ teaspoon Deggi Mirch adjust according to taste
- ½ teaspoon Haldi (Turmeric powder)
- ½ teaspoon Amchur Powder (Mango Powder)
- 1 teaspoon Coriander powder (sukha dhaniya)
- 1 teaspoon Fennel seeds Powder
- A pinch of Hing (asafoetida)
- ½ teaspoon Rai (Mustard seeds)
- ½ teaspoon Garam Masala Powder
- ¾ teaspoon Cumin powder
- 3 teaspoons Water
- – – Salt to taste
- – – Oil to cook the chilis
INSTRUCTIONS
- Rinse and pat dry the peppers.


- Using a sharp knife, cut down along one of the sides of the Mirchi.


- Open the Mirchi slightly, and make room for the stuffing by carefully removing the seeds and membranes from the insides of the peppers. Sprinkle the inner part of the peppers with salt and set them aside.


PREPARE THE FILLING
- Heat oil in a pan, add mustard seeds.


- As they start to crackle, add chickpea flour, along with degi mirch and haldi.

- Cook for about 10-15 minutes over medium heat until the chickpea flour starts to emit a pleasant, nutty aroma and turns into a deep golden color.

- Take the mixture off the flame and stir in the rest of the spices.

- Mix until thoroughly combined.

- Do the taste test and set aside the mixture to cool completely.

STUFF AND COOK THE PEPPERS
- Once the mixture is comfortable enough to touch, add 1-3 teaspoons of water to the mix and knead it well. Now tightly stuff each mirchi with the stuffing.


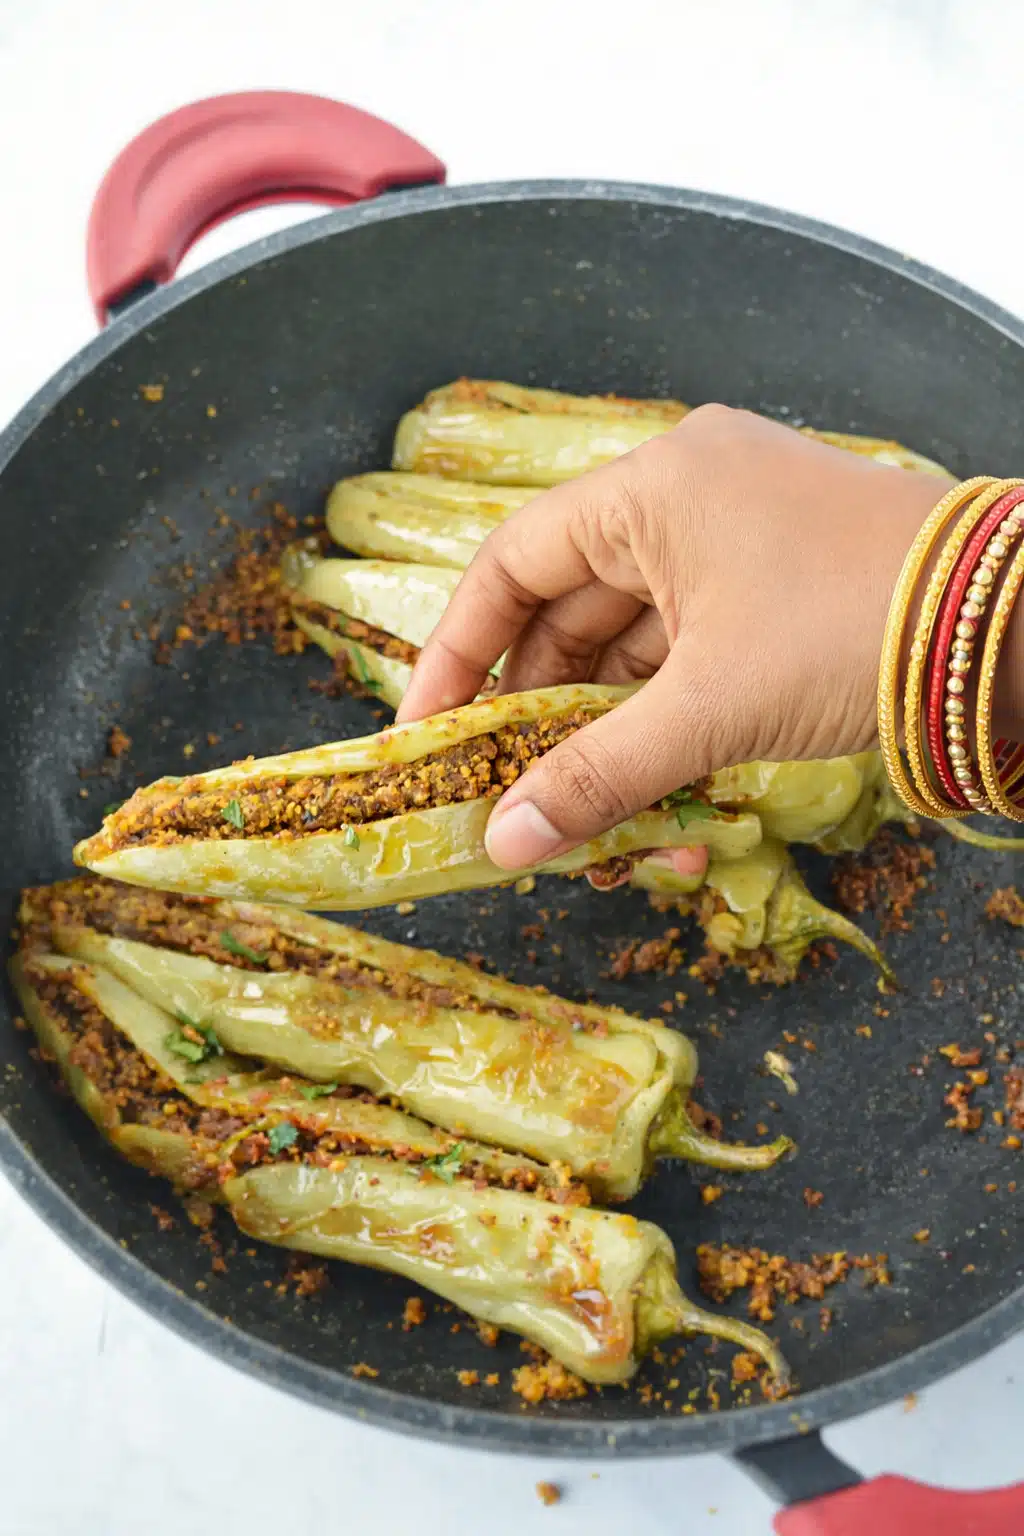
- Add oil to a cast-iron pan. Arrange the mirchis (with the skin side on top) in a single layer in the pan. Cover the pan with a lid and cook the peppers for 8-10 minutes. Turn the bharwan Mirchi around in the pan at the halfway point, and then continue cooking (with the stuffing side down) until the pepper’s skin is soft and cooked.

- Uncover the pan, and continue cooking the mirchis until the bharwan mirchi is golden and cripsy.

- Take it off the heat and serve.
RECIPE NOTES
- Rinse and pat dry the peppers,
- Make a slit,
- Deseed,
- Add water and knead the stuffing
- Stuff the peppers with the filling, and
- Cook as directed.
- Pizza -like stuffing made with bell peppers, onions, sauce, and cheese
- Spicy rice filling
- Mozzarella stuffed peppers or
- Roasted chickpeas and quinoa stuffed peppers.
Lovely recipe.
Thank you!
Lovely Reciepe
Thanks Kavya!
Will surely try Ruchi !!
I will prepare it tomorrow. The dish looks so yummy. Thanks for the recipe.
Pleasure is all mine.
Please share your feedback with me. I hope you like it as much as we do.
Awesome. Thanks!
I am going to make this right now thanks for the recipe 😊
Pleasure is all mine. 🙂
If possible share your feedback.
you make chilly less chilly . thanks
Well defined recipe!!
It tastes delicious 🌺
Awesome!
Thank you, Lalita.
Is the filling supposed to remain crumbly or become pasty? I felt that my filling wasn’t cooked even though the outside pepper was cooked.
Shilpa, sorry to hear that this recipe didn’t work for you. Did you cook the filling well before stuffing the peppers? Because, if the filling was well-cooked and dry, then it should not give a raw taste. The mixture should not become pasty at any point because no liquid was added to the filling. Though after stuffing the peppers, the filling will become slightly moist because of the moisture released from the peppers.