


Chicken Biryani is a highly aromatic, mouth-watering staple dish that needs no introduction. Because of its endless nuanced flavors, it is perhaps the most comforting meal of Indian cuisine that has been a part of community feasts, family gatherings, and almost every Indian household for ages.
Packed with fragrant rice and juicy, tender chicken pieces, it’s a perfect one-pot dinner recipe that your whole family will love!

If you are a traditional Indian food enthusiast, then I invite you to celebrate the authentic flavors of this culinary masterpiece, Chicken Biryani, that has delighted palates for generations.
Chicken Biryani is not just a dish; it’s an ambrosial experience, flavorful, aromatic, and completely divine!
The traditional Chicken Biryani recipe appears intricate owing to the extensive list of ingredients and elaborate cooking techniques, which stops many from attempting it at home.
But, I have tried to dispel that myth and simplified the process of making authentic biryani to help you create this culinary masterpiece with confidence.
With some time, a little patience, and a dash of passion, you can now unveil this exquisite recipe’s secrets and enjoy its rewards.
What is Chicken Biryani?
‘Biryani’ or ‘Biriyani’ is ’a layered rice dish’ in its literal meaning. It is a dish with layers of rice corresponding with the layers of marinated meat/ chicken or veggies or paneer/ tofu, slow-cooked in a sealed pot.
Aromatic spices lend exclusive flavors to the dish and infuse the dish with irresistible deliciousness.
The spice blend varies from region to region, but it is a harmonious mix of exquisitely chosen, most flavorsome spices.
Today, I am sharing a Dum Pukht chicken Biryani that dates back to the era of the Mughals. A unique style of steam cooking characterizes this stove-top Chicken Biryani recipe.
In Dum Pukht Biryani, rice, chicken, aromatic spices, and herbs are cooked in traditional handis or heavy-lidded cast iron pan, which is later sealed with kneaded flour to keep all the steam and flavor locked in.
This layered and sealed utensil is then simmered over low heat until the flavors mingle and rice absorbs in all the protein juices, resulting in a rich and impressively flavorful meal.
One of the most intriguing facts is that when you serve biryani, you are serving the celebration of flavors and togetherness!
IMAGE
Reasons You’ll ♡ Chicken Biryani
Whether you are a seasoned home cook or a novice in the kitchen, this Biryani recipe empowers you to create a mouth-watering dish regardless of your culinary prowess. Other reasons that will make you fall in love with this recipe are —
- Wholesome and hearty
- Provides an exquisite symphony of flavors and textures
- One-pot complete meal
- Scalable recipe
- Can be made in advance and stored and
- Revered and admired by all age groups!
One of the fascinating attributes of this dish is the joy of making it and savoring it with your loved ones. So, whether it is any special occasion, a festive celebration, or a family get-together, biryani brings your loved ones together.
Introduce the Chicken biryani casserole to the table tonight and let its ‘oh-so-good’ aroma steal the spotlight!

Ingredient List for Chicken Biryani
Chicken — Chicken drumsticks and thighs are ideal for this recipe, as these retain moisture during the slow cooking process, resulting in juicy and succulent chicken.
Rice — Extra long Basmati rice is the most preferred choice for making Chicken Biryani. When cooked, the grains stay separate and fluffy and absorb the flavors of the spices and chicken well. Look out for the properly aged fragrant basmati rice for best results.
Ginger and Garlic paste — A fundamental component of most savory dishes, ginger and garlic infuse the dish with a depth of flavor. The zesty warmth of ginger combines with the spicy earthiness of the garlic, adding an aromatic richness to the marinade.
Fresh herbs — Cilantro and mint are vital components of this Chicken biryani as they elevate the overall taste of the recipe. They add a burst of freshness to the dish and infuse a delightful fragrance while balancing the richness of spices and other ingredients.
Onions — They are one of the significant ingredients of this Chicken Biryani, and a lot of them are used here. The crispy fried caramelized onions, called Birista, are the key components that are used for garnishing and adding a smokey sweetness to the dish.
Whole Spices — The hallmark of traditional biryani recipes, whole spices create an aromatic base that infuses into the entire dish, imparting a unique flavor profile. Bay leaves, whole black cardamom, star anise, cinnamon sticks, cloves, peppercorns, and shahi jeera are the significant spices rendering depth and complexity of flavors to the recipe.
Spices and seasonings — Creating a delectable balance of heat, earthiness, and sweetness, the spices and herbs elevate the deliciousness of the biryani. Degi mirch, coriander powder, turmeric, garam masala powder, mace, and salt are the essential spices and seasonings used to make this soul ravisher.
Milk and Saffron — Saffron threads soaked in warm milk impart a vibrant yellow color to the dish besides the exquisite aroma. Saffron-infused milk enhances the overall taste and adds a subtle, luxurious flavor to the recipe.
Yogurt and Lime juice — Used in the marinade for their unique qualities, yogurt and lime juice are the essential ingredients of this recipe. Lime juice tenderizes the chicken while also adding citrusy notes to the dish. Yogurt also helps tenderize the chicken while rendering creamy richness to the marinade.
Ghee + Oil — Any neutral, refined oil is good for cooking the biryani. But homemade desi ghee will create wonders.

Chicken Biryani Tips and Variations
Basmati rice is the best — Basmati rice is the best option for Biryanis as it is the most flavorful and aromatic rice with beautiful long grains. The adequately aged Basmati produces a fluffy and fragrant biryani; therefore, I recommend using it.
Avoid overcooking completely — Biryani is all about rice; therefore, cooking the rice right is imperative. Biryani calls for 70 percent cooked rice, which means it’s al dente. At this stage, the rice grains are slightly firm (not tough) when pressed in between the fingers. However, care should be taken to avoid turning them mushy with overcooking.
How to tell if your rice is overcooked? Well-cooked rice will be extra plump and fluffy as it has passed the al dente stage. At this point, it breaks easily when pressed between fingers. If your rice has reached this stage, please do not proceed with the recipe, or you will end up with a very mushy and unappetizing dish.
Spices and herbs bring magical flavors — The magical deliciousness that conjures the senses is lent by the authentic spices and herbs as they infuse the rice with a remarkable aroma and drool-worthy flavors. Simply put, without the spices and herbs, the biryani would not be the masterpiece it is!
Marinating makes all the difference — The importance of marinating the chicken pieces is evident from the amount of flavor it brings to the biryani. The marinade, which comprises spices, herbs, and other flavoring ingredients, furnishes lip-smacking deliciousness to the dish. Marinating the chicken for an hour allows the chicken to become succulent and also to soak up the flavors. Overnight marinating is best if you have some extra time on hand.
Preparing the chicken for marination — Before adding the marinade, it is important to pat dry each chicken piece to remove the moisture, as it may interfere with the proper coating of the marinade on the chicken pieces. Once dry, add the marinade to the chicken pieces and leave it, therefore allowing time for the marinade to work on the chicken. This resting time lets the flavors seep into the chicken pieces and helps them to become irresistibly juicy and succulent.

Birista as an essential add-on — Crispy fried onions or Birista are the essential element of the recipe that renders a magical flavor to the dish. Without the birista, biryani would lack the necessary flavor and be incomplete. You can easily prepare birista at home by frying the onion slices, or you can use the store-bought ones. When using the store-bought birista, remember to check the date on it as the stale ones will have a smell to them, which will ruin the biryani.
For the crunchy birista — Biryani tastes superb when layered with the crunchy birista on the top. To make crunchy birista, I prefer to coat the onions with cornstarch. You may use besan in the place of cornstarch if the latter is not available. However, don’t forget to shake off excess flour, else it will mess up the oil.
Fry the onions with patience — If you haste with the process, you will end up with greasy, mushy onions. So take your time and fry them till they are golden brown and crisp. Brown them as you desire; if you prefer a lighter shade, remove them from the oil after a couple of minutes when they color up. Otherwise, fry it a little longer till it reaches your desired shade. Use a slotted spoon to remove the fried onions from the hot oil.
Shelf-life of the fried onions/ birista — Fried onions can be used to flavor many other recipes like pulaos, cutlets, marinades, and some soups. Therefore, you can make a big batch and store it for later use. They keep well for a month in the refrigerator when stored in an airtight container.
Cook in the sealed pot for maximum flavors — The pressure cooking in a sealed pot pumps the flavor into the rice and makes the dish irresistibly aromatic and flavorsome. Therefore, always cook biryani in a pot sealed with either kneaded dough or with a cloth cover so that the steam and the flavors remain locked in.
Selecting the right cookware — Biryani is slowly cooked over low heat, and the pot is sealed to lock in the steam and the flavors. For this, a heavy-bottomed pan is the most appropriate choice, as this will prevent the rice from sticking or burning at the bottom. For this recipe, I have used a Dutch oven. If you don’t have a thick-bottomed pan, use a grill below your thin skillet to prevent burning.
Substitute for Shahi Jeera — Cumin seeds substitute Shahi Jeera perfectly. So, if you don’t have shahi jeera on hand, you can conveniently use cumin seeds.
Authentic dum-cooking in clay pots — The authentic way of preparing this dish involves cooking in a clay pot, where the nutrients are preserved, and the prepared dish becomes more nutritious and healthier.
A helpful modification — The traditional biryani-making procedure includes adding marinated chicken to the parboiled rice and then steaming it in the sealed handis (pot). But I prefer to cook the chicken a little before layering it with rice. Small raw chicken pieces cook well with the parboiled rice, but the big chicken pieces and bone-in chicken remain undercooked. From an efficiency standpoint, I prefer to pre-cook these pieces slightly before layering. The downside benefit is that you end up with tender, juicy, and well-cooked chicken pieces. It’s a win-win with just a slight modification in the approach, and you get the most irresistible biryani to relish!
Add a restricted amount of yogurt — Yogurt helps tenderize the chicken and lends a slight tang to the flavor. But, since yogurt can blunt the taste of the chicken, I prefer adding just a small amount of it to the marinade.
Use Greek yogurt for best results — Full-fat Greek yogurt is the most preferred choice for this recipe as it brings excellent results.
Irresistible oven-cooked biryani — If you don’t prefer the traditional method of cooking biryani in the pan/pot, try baking it in the oven. After assembling, bake it in a preheated oven at 325 degrees F for 20-30 minutes. Trust me, the oven biryani tastes equally good as compared to the stovetop biryani, as the consistent heat of the oven works great and brings fantastic results.

Let me know what you think!
Are you ready to embark on your biryani-making adventure? I am sure you are!
So, gather your ingredients, and we are all set to begin our journey to curate a wonderful dish that not only tantalizes the taste buds but also brings the vibrancy and flavors of India’s culinary heritage to your dinner table tonight.
Should you make this Chicken Biryani recipe, please let me know your thoughts by sharing your comment below.
And don’t forget to share it with your family and friends.
CRAVING FOR MORE, TRY SOME OTHER MOUTHWATERING RECIPES –
Follow the step-by-step instructions below to make the best Chicken Biryani recipe

Chicken Biryani
EQUIPMENT
INGREDIENTS
FRIED ONIONS OR BIRISTA – it will yield 1/2 cup of birista
- 3 medium Onions
- 2 tablespoons Cornflour
- Oil for Frying
SAFFRON MILK
- 3 tablespoons Milk
- 1½ teaspoons Saffron strands
BIRYANI SPICE BLEND – MAKES 3 TABLESPOONS OF SPICE BLEND
- 1¼ teaspoon Garam Masala Powder
- ½ teaspoon Haldi (Turmeric powder)
- 2 teaspoons Shahi Jeera
- 1½ teaspoons Coriander Powder
- 1 teaspoon Kasoori methi/ dried fenugreek leaves
- ½ teaspoon Black Pepper
- ½ teaspoon Mace (Javitri) crushed to powder
- 2 teaspoons Kashmiri Red chili powder
CHICKEN MARINADE
- 1 lb Chicken drumsticks, chicken thighs boneless, skinless, and cut into pieces
- ¼ cup Lemon Juice
- ½ cup Yogurt
- ½ tablespoon Garlic paste
- ½ tablespoon Ginger paste
- 1 tablespoon Lemon juice
- 1 cup Fried onions or Birista
- 2 tablespoons Chopped Cilantro
- 2 tablespoons Chopped Mint leaves
- – – Salt to taste
- 5 tablespoons mustard oil
- – – Biryani spice blend prepared above
FOR RICE
- 1½ cups Rice
- 2¼ cups Water
- 2 – Whole Black Cardamom
- ¼ teaspoon Cloves
- ¼ teaspoon Cumin seeds
- 3 – Bay leaves
- 1 – Cinnamon Stick
- 1 – Star Anise optional
- 2 teaspoons Salt
COOK MARINATED CHICKEN
- 3 tablespoons Oil or ghee
- 2 – Bay leaves
- 1 large Onion thinly sliced
ASSEMBLE CHICKEN BIRYANI
- Seasoned parboiled rice from above
- Half- Cooked chicken along with its juices
- Fried Onions or Birista
- Saffron milk
- Ghee
- Fresh cilantro and mint leaves
- Garam Masala Powder optional
INSTRUCTIONS
MAKING OF BIRISTA- FRIED ONIONS
- Heat oil in a pan.

- Combine the thinly sliced onions and cornstarch in a large bowl. Toss to coat cornstarch all over the onion rings.


- Dust off the excess cornstarch and add a batch of onion rings to the hot shimmering oil. Fry the onions for 7-8 minutes or until deep golden brown. Remove from oil and drain on a kitchen paper towel. Repeat until all the coated onions are cooked. Tip — Always remember to fry the onions in batches as it will prevent overcrowding of the onions and assist in better frying.

- Fried onions are ready for biryani. Tip — Overcooking the birista will impart a bitter taste; therefore, fry the onions until golden brown. At this stage, the onions will be flavorful and add a subtle sweetness to the biryani.


- Let’s move on to the next step. Add milk to a microwave-safe bowl. Heat the milk for 40 seconds. Remove from the microwave and add saffron strands to the milk. Stir until combined and set aside.


MARINATE CHICKEN
- Clean and wash the chicken pieces thoroughly under tap water. Drain the water completely.


- Combine the rinsed chicken pieces with lemon juice in a large whisking bowl. Toss to combine. Cover and refrigerate the chicken for at least 30 minutes.Tip — To have the most tender and succulent chicken pieces, adding lemon juice to the marinade will work wonders. Papaya can be used instead of lemon juice if the latter is not available. It will bring outstanding results, too.


- After the rest time is over, add yogurt, biryani spice blend, and ginger-garlic paste to the chicken.
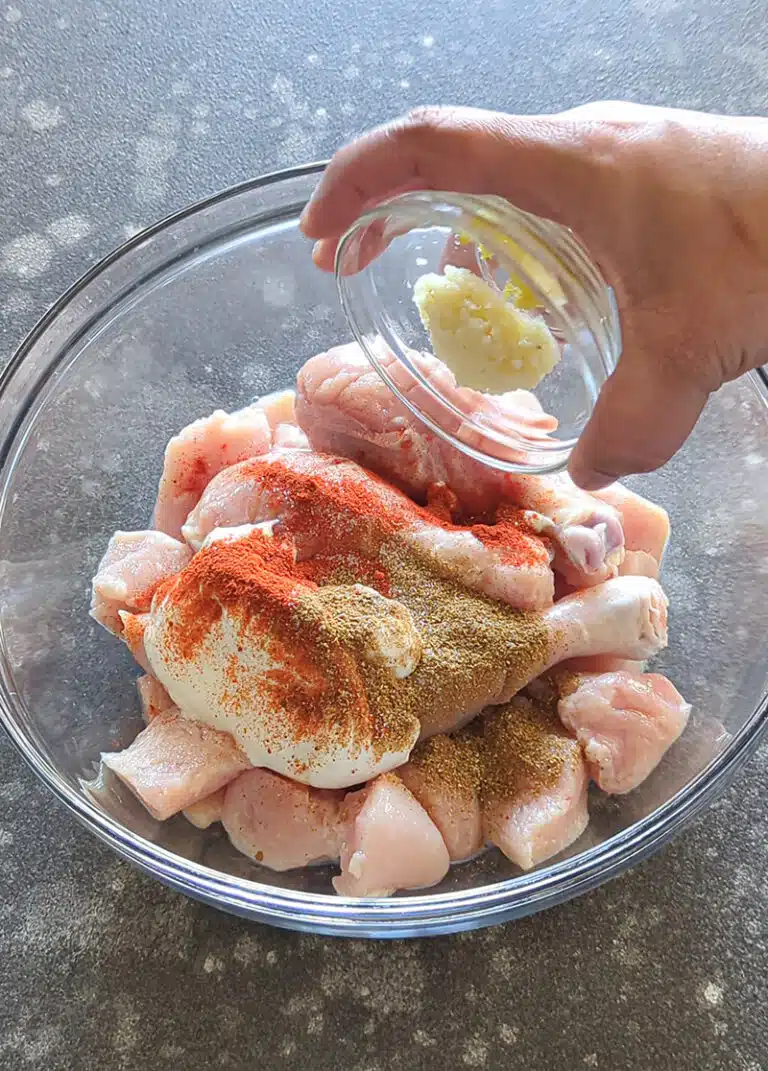

- Add fried onions, mustard oil, cilantro leaves, and mint leaves to the chicken.


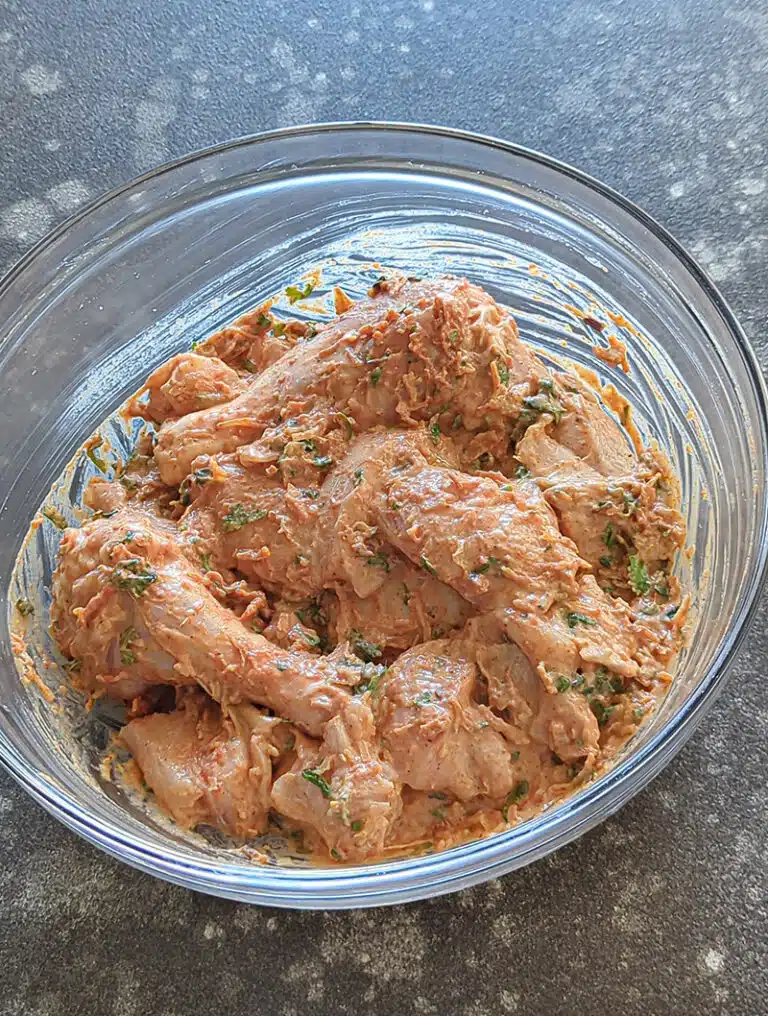
- Mix and toss the chicken to coat in tis marinade. Rub the marinade all over the pieces.


- Cover and allow it to rest for an hour.

PREPARE RICE
- While the chicken is marinating, let's work with the rice. Sort through the rice to remove all the pebbles and gritty things. Rinse and rub rice thoroughly until the water runs clear. Pre-soak the rice for 20 minutes. After that, drain and set it aside.Tip — This step is essential. Soaking the rice for enough time allows the rice to become stronger, and as such, the rice puffs up really well. A minimum of 20 minutes of soaking time is recommended to achieve the best results.


- Add water to a large pan which has a tight-fitting lid. Flavor the water with whole spices, cumin seeds, and salt.


- Add rinsed rice to this water. Give it a good stir. Bring it to a simmer over medium heat. Simmer the rice for 10 minutes, uncovered. Tip — When the rice is cooked in spiced water, it absorbs water and gains flavor and aroma.


- Gently mix the rice and parboil it (halfway cooked) for 4-6 minutes in hot water. When the cooking time has elapsed, turn off the heat and let the rice stand in hot water for 4-5 minutes. The rice should be 70% cooked. Tip — To check whether the rice has reached the al dente stage (parboiled), squeeze a few grains of rice between your fingers. Your rice is done if you feel a slight firmness in the grain.


- If it breaks instantly when pressed, then you have overcooked the rice. Refrain from proceeding with this rice, as you will end up with sticky biryani.

- Once the rice is parboiled, turn the heat off. Remove the rice from the pan and drain it in the strainer. Let the rice stand in the sieve for 2-3 minutes until all the extra water is drained.Tip — Do not cover the rice right away. Let it dry for a few minutes. The rice is now ready for biryani, which needs further cooking.


- Discard the whole spices.


- Replace the cover to keep the rice warm.


COOK THE CHICKEN
- Heat ghee in a heavy-bottomed Dutch oven. Add chicken and cook.


- Cook the chicken pieces for 5-6 minutes over medium heat. You want it mostly cooked. The rest of the cooking will finish in the assembled biryani. Once the cooking time has elapsed, please remove it from the heat and set it aside.


ASSEMBLE BIRYANI
- Time to assemble the chicken biryani. Take a handi or a deep dish pan. Drizzle oil or ghee at its base. Add bay leaves and sliced onions to this pan. Sauté until the onions are translucent.


- Add half-cooked chicken to the pan.


- Layer it with parboiled rice and drizzle a generous amount of ghee over it. Tip — Add a touch of richness. Homemade desi ghee contributes rich flavor and more deliciousness to the recipe; therefore, using it instead of oil or butter is considered healthier.


- Layer this delicious biryani with chopped cilantro, mint leaves, and fried onions. Drizzle the saffron milk mixture overtop.

- Finally, add a dash of garam masala. Sprinkle a tablespoon of water and seal the pan.

- Cover the pan and seal the cover with a cloth or kneaded dough. Dum, cook for 10-15 minutes until rice is cooked thoroughly and is all fluffy and plump. Tip — The cloth cover adds a little extra seal. It's not quite as good as the dough seal in a traditional biryani, but it will work pretty well.

- Remove the cloth and uncover the pan once the desired cooking time is done.


- Chicken biryani is all ready. Allow it to sit undisturbed in the pan for 5-10 minutes.

- Fluff the cooked biryani with a flat spoon.

- Garnish with more fried onions and a fresh sprig of mint leaves. Serve hot, along with your favorite raita or chutney.

amazing teast … thanks for sharing.
You are welcome, Nitu!!
Aise hi lovely recipes share krte rhiyega….
Sure dear will do that. Thanks for stopping by and I glad you liked it, Nitu. 🙂
This is a great recipe. Thank you for sharing it.
You are welcome Kiran. Glad you liked it!!
Excellent, what a blog it is! This webpage presents valuable facts to us, keep it up.
Thanks William!!
Very nice write-up. I absolutely appreciate your site. Lovely and easy to make recipes. Continue the good work!
Thanks Joels! Glad you liked. 🙂
Am a vegetarian. Making for someone SPL.Could u assist me from where can I get chicken or which part of chicken should be used.Real or Venkys can be used.
Thanks for stopping by Sheetal. You can get chicken from your local supermarket or meat shop. Since you are a vegetarian, I would suggest buying an already clean pack from the market. Chicken legs and thighs are good to begin with.
Thanks for sharing this.. appreciate your work..i tried in pressure cooker previously..will try this in pan with cloth..
Pleasure is all mine. Thanks for stopping by.
very nice showing method,&very clear steps to follow the recipe,thanks.I like it.no word to say really nice one keep it up , Thanks.
Thank you, David.
Glad to hear that you found the recipe helpful!
Loved it. Simple and elegant recipe. Passed this on to many people and all have the same opinion.
Thank you, Veronika! So glad you liked the recipe.
This was a well explained recipe. The taste was amazingly amazing. I can’t get over the taste of it.
Thanks
The pictures are gorgeous, love these food recipes which I am trying one tonight.
Thank you!
Thoroughly enjoyed the process of your cooking the chicken biryani . thanks for the step by step instructions
Great receipe great narration thanks . With new tips hacks I will make with new vigour
This is the second time I’ve made your chicken biryani recipe and I love it Ruchi!!! It’s one of my go tos! Thanks from the bottom of my heart!
Thank you, Aarya! So glad you liked the recipe. 😊
The chicken was partially cooked, Preena.
Thanks for sharing your experience with me. Glad you liked the recipe. 🙂
I am not clear about that part… was the chicken fully cooked before you started with layering the rice? I tried this recipe last night… I added the half cooked rice to the chicken which had been in the kadhai for only 5 minutes… cooked on dum for around 30 minutes… the chicken was cooked and extremely tender. I thought that this was because the chicken had been marinating for around 4 hours.
The biryani turned out great… Thankyou for sharing the recipe.
Oops, sorry about that Sanjiv, fixed it!! Thanks for pointing that out to me. Rice was seasoned during the cooking process, just missed mentioning about the salt.
Oops..excuse me for not being so clear in my steps and thanks for bringing this up Adele. As stated in the recipe, rice is half cooked and chicken is fully cooked – so after assembling everything together biryani is only cooked for 10-12 minutes on a low flame or until rice is soft. 1:30 hour includes 1 hour of marination and 30 minutes of cook time. In between that 1 hour of marination rest of the recipe was assembled. Hope that helps 🙂