
Chatpati Cone Chaat Recipe
If you love Indian street food, this Chatpati Cone Chaat recipe is the perfect crispy, spicy, and tangy snack to add to your party menu. Filled with a flavorful aloo mixture, chutneys, sev, and chaat masala, this recipe delivers everything you love about traditional Indian chaat in a fun handheld cone.
Servings: 10 CONES
Calories: 167kcal
Ingredients
FOR CONES
- 1 cup All purpose flour maida
- ¼ cup Oil
- ½ tablespoon Baking powder
- ½ teaspoon Ajwain/ Carrom seeds
- - - Salt to taste
- ½ cup of Water OR Curd
- Oil for Frying
PREPARE CURD FOR THE CHAAT
- 1 cup Beaten Curd (yogurt)
- ½ teaspoon Roasted Cumin Seeds
- ¼ teaspoon Red chili powder
- ¼ teaspoon Black Salt
STUFFING FOR CONES
- 15 pieces of Potato Balls
- 1 cup Chickpeas boiled and drained
- ½ cup Tomatoes Chopped, without pulp
- ½ cup Onions finely chopped
- ½ cup Tamarind Chutney
- ½ cup Green Chutney
GARNISHES - TO SPRINKLE ON TOP
- 2 teaspoons Chaat Masala
- ¼ teaspoon Red chili powder
- ¼ teaspoon Black Salt
- 1 teaspoon Chopped cilantro leaves
- ¼ cup Thin Sev
Instructions
WRAPPING CONES
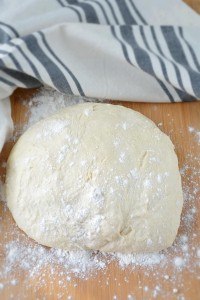
- Knead the dough by combining all the ingredients. Add water carefully - we don't want the dough to be too watery or sticky. Tip — Water helps bring the dough together. Curd can also be used for a slightly richer dough with a softer bite.

- The cone dough should be firm, not soft or sticky. A soft dough can lose shape while wrapping and may not crisp properly during frying or baking.Tip — Rest the dough before rolling — Let the dough rest for 10 to 15 minutes. Resting relaxes the gluten, making the dough easier to roll and preventing it from shrinking too much.
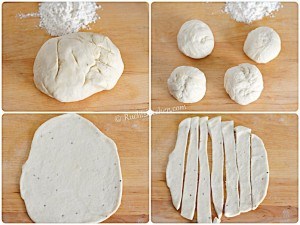
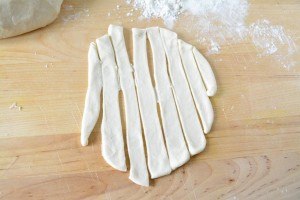
- Make small balls and roll out the dough in a form of a big circle. Roll the dough neither too thick nor too thin. Thick dough can make the cones heavy and dense. Very thin dough can tear while wrapping or crack after cooking.Use a pizza cutter or a knife to slice the dough into thin strips. (as shown in the pic).
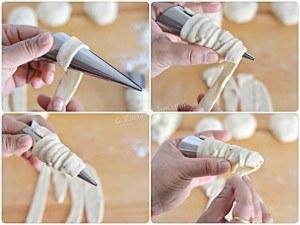
- Begin wrapping each cone from the top and work your way down. If one strip runs out before the cone is fully covered, continue with the next strip. Once you reach the bottom, finish wrapping and press to seal the end.
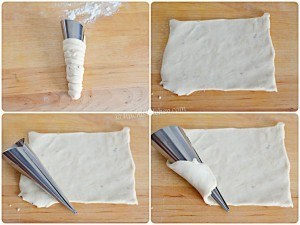
- You can also roll the cones using a different method: instead of cutting strips, cut a square from the rolled dough. Starting at one corner, wrap the dough around the cone so it spirals on its own. Pinch the end to seal it in place.
- Seal the dough strips well — When wrapping the dough around the cone molds, overlap each strip slightly.

- Press the edges gently so there are no gaps. This helps the cone hold its shape. The wrapped cones are ready to go into the oil.

BAKED CONES
- Preheat the oven to 300°F. To bake the cones, roll out the dough and cut it into strips.For a lighter option, bake the wrapped cones instead of frying them. Brush them with oil or melted butter, add sesame seeds if you like, and bake until they’re crisp and lightly golden.
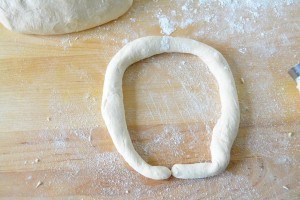
- Now roll each strip into a thin, log‑like shape.

- Combine the strips and shape them into one large loop.
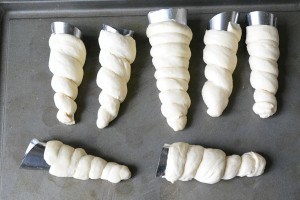
- Place the cone at one end and begin wrapping the dough around it.

- Wrap the entire cone, then trim off any excess dough.

- All wrapped cones are ready for baking.
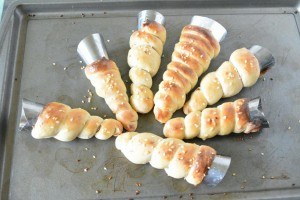
- If baking the cones, brush them lightly with melted butter or oil. This helps them turn crisp and lightly golden.

- Bake for 15–20 minutes, or until the cones turn lightly golden and begin to brown.
- Let cones cool before removing molds — Do not remove the molds immediately after frying or baking. The cones are delicate when hot. Let them cool slightly, then gently twist and remove the molds.
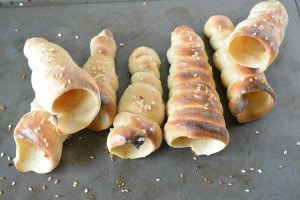
- Sesame seeds can be sprinkled over baked cones before baking. They add a nutty flavor, extra crunch, and a pretty finish.

- Keep the cones dry. Moisture is the biggest enemy of crispy cones. Store cooled cones in an airtight container only after they are completely cool.

FRIED CONES
- Heat the oil in a pan. Using tongs, carefully lower the cones into the hot oil one at a time.Choose a neutral oil with a high smoke point—such as vegetable, canola, sunflower, or peanut oil. The oil should be hot enough to crisp the cones without browning them too quickly. Fry on medium heat. If the oil is too hot, the cones will brown quickly outside but remain undercooked inside. If the oil is too cool, the cones will absorb oil.Tip — Do not overcrowd while frying. Fry only a few cones at a time. Overcrowding lowers the oil temperature and can make the cones greasy instead of crisp.
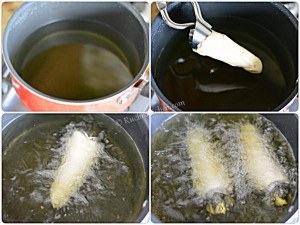
- Fry the cones until they turn golden brown. Tip — Drain fried cones properly. After frying, hold the cone tilted for a few seconds so any oil trapped inside can drain out. Then place it on a paper towel or wire rack to absorb the excess oil.

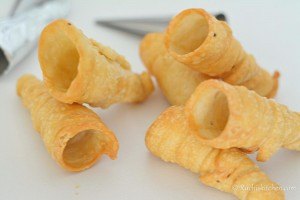
- Continue frying the remaining cones. Deep‑frying gives them a classic, crisp texture with a richer, more traditional snack‑style crunch.

- Let the cones rest for a bit. Once they’ve cooled, hold the bottom and gently slide off the cone molds.
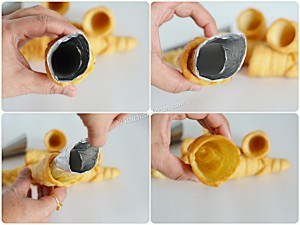
- The cones are now ready to be filled with any stuffing you like.
ASSEMBLING CONES
- Drain chickpeas well. After boiling chickpeas, drain them completely. Wet chickpeas release moisture and can soften the cones.

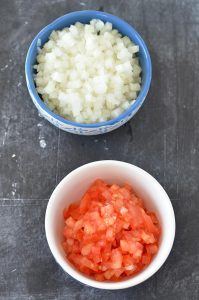
- Finely chop the onions and tomatoes to add extra crunch to the chaat. Tomatoes contain a lot of water. Remove the seeds and pulp before chopping so the filling stays fresh but not watery.
- Prepare the curd. All the spices and whisk the curd until smooth. Thick, plain yogurt is best for cone chaat. Avoid watery yogurt because it can make the crispy cones soggy. Greek yogurt works well for Chatpati Cone Chaat because it is thick and creamy. You can thin it slightly with a spoonful of water or milk if it is too thick to drizzle. Set it aside.

- Assemble: all the ingredients.Keep the chutneys thick. Thin chutneys can soak into the cone shell and make them soggy.

- Break aloo balls in half and stuff it inside the cone. Add green chutney and tamarind chutney.

- Layer the filling carefully — Start with potato calls and chickpeas at the bottom, then add chutneys, yogurt, onions, tomatoes, spices, and sev. This gives every bite a balanced flavor.

- Repeat the toppings—green chutney, curd, tamarind chutney, and a sprinkle of chaat masala until you reach the top.

- Cone chaat is ready.

- Do not overfill the cones — Overfilled cones can break or become messy to eat. Fill them enough to look generous but still easy to hold.

- Cone chaat should be assembled right before serving because yogurt, chutneys, tomatoes, and chickpeas contain moisture. If the cones are filled too early, they can lose their crisp texture and become soggy.

- Serve the cones upright in small glasses, a cone stand, shot glasses, or a tray with support so they do not tip over.

Notes
Frequently Asked Questions
What is the easiest way to make Chatpati Cone Chaat at home? The easiest way to make Chatpati Cone Chaat is to prepare crispy cones in advance and keep the filling ingredients ready separately. When ready to serve, fill each cone with potato pieces, chickpeas, onions, tomatoes, yogurt, green chutney, tamarind chutney, chaat masala, and sev. Can I serve Chatpati Cone Chaat for a party? Yes, Chatpati Cone Chaat is an excellent party appetizer. It looks creative, is easy to customize, and can be served as individual finger food or as a DIY chaat bar. How far in advance can I make the cones? The empty cones can be made a few hours in advance or even a day ahead if stored properly in an airtight container after cooling completely. Do not fill them until serving time. Can I refrigerate chaat cones? Do not refrigerate empty crispy cones because fridge moisture can make them soft. Refrigerate only the fillings, chutneys, yogurt, and toppings separately. How long does assembled cone chaat stay crispy? Assembled cone chaat is best eaten immediately. Once filled with yogurt and chutneys, the cones may begin to soften within a few minutes. Can I reheat chaat cones? Yes, empty cones can be reheated in an oven or air fryer for a few minutes to make them crisp again. Let them cool before filling. Can I make cone chaat without onion? Yes, cone chaat can be made without onion. Use potatoes, chickpeas, tomatoes, yogurt, chutneys, chaat masala, sev, and cilantro for a no-onion version. Can Chatpati Cone Chaat be made vegan? Yes, make cone chaat vegan by using dairy-free yogurt and brushing baked cones with oil instead of butter. Also make sure the chutneys do not contain dairy. How do I make cone chaat more spicy? To make cone chaat spicier, add extra green chutney, garlic chutney, chopped green chilies, red chili powder, black salt, and extra chaat masala. What is the best garnish for cone chaat? The best garnishes for cone chaat are fine sev, chopped cilantro, pomegranate seeds, roasted cumin powder, chaat masala, and a drizzle of both chutneys. Why did my cones break after frying? Cones may break if the dough is rolled too thin, the seams are not sealed, the molds are removed too early, or the cones are handled while still very hot. Why did my cones open while frying? Cones may open while frying if the dough strips were not overlapped properly or the seams were not pressed firmly. Slightly moisten the edge of the dough strip to help it stick before frying.Nutrition
Calories: 167kcal | Carbohydrates: 19g | Protein: 4g | Fat: 9g | Saturated Fat: 2g | Polyunsaturated Fat: 2g | Monounsaturated Fat: 4g | Trans Fat: 0.02g | Cholesterol: 3mg | Sodium: 495mg | Potassium: 197mg | Fiber: 2g | Sugar: 3g | Vitamin A: 678IU | Vitamin C: 5mg | Calcium: 70mg | Iron: 1mg