
Chicken Biryani
Chicken Biryani is a highly aromatic, mouth-watering staple dish that needs no introduction. Because of its endless nuanced flavors, it is perhaps the most comforting meal of Indian cuisine that has been a part of community feasts, family gatherings, and almost every Indian household for ages.
Servings: 6
Calories: 582kcal
Ingredients
FRIED ONIONS OR BIRISTA - it will yield 1/2 cup of birista
- 3 medium Onions
- 2 tablespoons Cornflour
- Oil for Frying
SAFFRON MILK
- 3 tablespoons Milk
- 1½ teaspoons Saffron strands
BIRYANI SPICE BLEND - MAKES 3 TABLESPOONS OF SPICE BLEND
- 1¼ teaspoon Garam Masala Powder
- ½ teaspoon Haldi (Turmeric powder)
- 2 teaspoons Shahi Jeera
- 1½ teaspoons Coriander Powder
- 1 teaspoon Kasoori methi/ dried fenugreek leaves
- ½ teaspoon Black Pepper
- ½ teaspoon Mace (Javitri) crushed to powder
- 2 teaspoons Kashmiri Red chili powder
CHICKEN MARINADE
- 1 lb Chicken drumsticks, chicken thighs boneless, skinless, and cut into pieces
- ¼ cup Lemon Juice
- ½ cup Yogurt
- ½ tablespoon Garlic paste
- ½ tablespoon Ginger paste
- 1 tablespoon Lemon juice
- 1 cup Fried onions or Birista
- 2 tablespoons Chopped Cilantro
- 2 tablespoons Chopped Mint leaves
- - - Salt to taste
- 5 tablespoons mustard oil
- - - Biryani spice blend prepared above
FOR RICE
- 1½ cups Rice
- 2¼ cups Water
- 2 - Whole Black Cardamom
- ¼ teaspoon Cloves
- ¼ teaspoon Cumin seeds
- 3 - Bay leaves
- 1 - Cinnamon Stick
- 1 - Star Anise optional
- 2 teaspoons Salt
COOK MARINATED CHICKEN
- 3 tablespoons Oil or ghee
- 2 - Bay leaves
- 1 large Onion thinly sliced
ASSEMBLE CHICKEN BIRYANI
- Seasoned parboiled rice from above
- Half- Cooked chicken along with its juices
- Fried Onions or Birista
- Saffron milk
- Ghee
- Fresh cilantro and mint leaves
- Garam Masala Powder optional
Instructions
MAKING OF BIRISTA- FRIED ONIONS
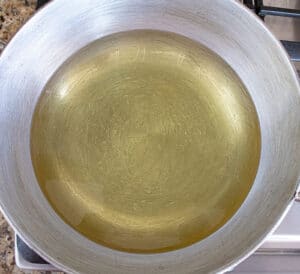
- Heat oil in a pan.
- Combine the thinly sliced onions and cornstarch in a large bowl. Toss to coat cornstarch all over the onion rings.
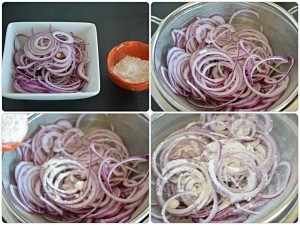
- Dust off the excess cornstarch and add a batch of onion rings to the hot shimmering oil. Fry the onions for 7-8 minutes or until deep golden brown. Remove from oil and drain on a kitchen paper towel. Repeat until all the coated onions are cooked. Tip — Always remember to fry the onions in batches as it will prevent overcrowding of the onions and assist in better frying.
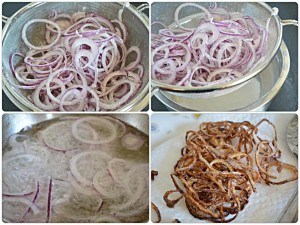
- Fried onions are ready for biryani. Tip — Overcooking the birista will impart a bitter taste; therefore, fry the onions until golden brown. At this stage, the onions will be flavorful and add a subtle sweetness to the biryani.

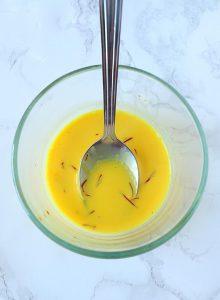
- Let’s move on to the next step. Add milk to a microwave-safe bowl. Heat the milk for 40 seconds. Remove from the microwave and add saffron strands to the milk. Stir until combined and set aside.
MARINATE CHICKEN
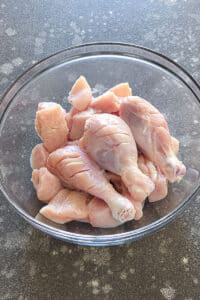
- Clean and wash the chicken pieces thoroughly under tap water. Drain the water completely.
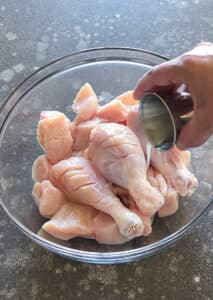
- Combine the rinsed chicken pieces with lemon juice in a large whisking bowl. Toss to combine. Cover and refrigerate the chicken for at least 30 minutes.Tip — To have the most tender and succulent chicken pieces, adding lemon juice to the marinade will work wonders. Papaya can be used instead of lemon juice if the latter is not available. It will bring outstanding results, too.
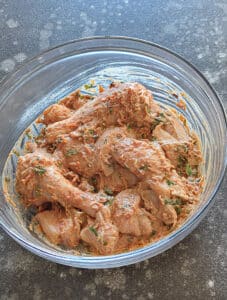
- After the rest time is over, add yogurt, biryani spice blend, and ginger-garlic paste to the chicken.

- Add fried onions, mustard oil, cilantro leaves, and mint leaves to the chicken.

- Mix and toss the chicken to coat in tis marinade. Rub the marinade all over the pieces.

- Cover and allow it to rest for an hour.
PREPARE RICE
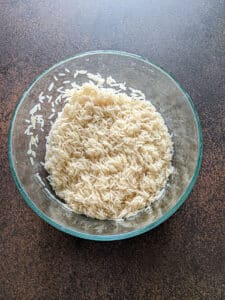
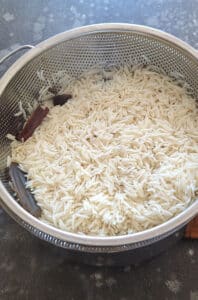
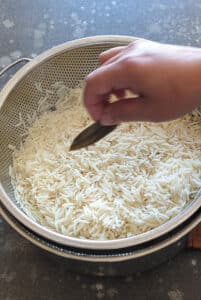
- While the chicken is marinating, let's work with the rice. Sort through the rice to remove all the pebbles and gritty things. Rinse and rub rice thoroughly until the water runs clear. Pre-soak the rice for 20 minutes. After that, drain and set it aside.Tip — This step is essential. Soaking the rice for enough time allows the rice to become stronger, and as such, the rice puffs up really well. A minimum of 20 minutes of soaking time is recommended to achieve the best results.
- Add water to a large pan which has a tight-fitting lid. Flavor the water with whole spices, cumin seeds, and salt.
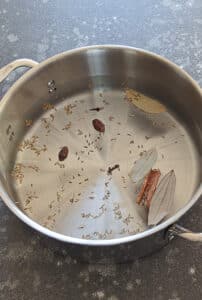
- Add rinsed rice to this water. Give it a good stir. Bring it to a simmer over medium heat. Simmer the rice for 10 minutes, uncovered. Tip — When the rice is cooked in spiced water, it absorbs water and gains flavor and aroma.
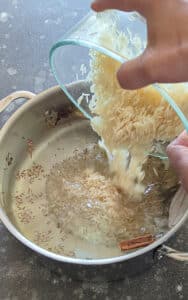
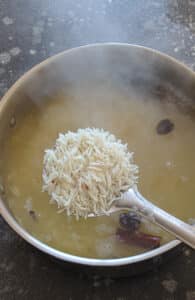
- Gently mix the rice and parboil it (halfway cooked) for 4-6 minutes in hot water. When the cooking time has elapsed, turn off the heat and let the rice stand in hot water for 4-5 minutes. The rice should be 70% cooked. Tip — To check whether the rice has reached the al dente stage (parboiled), squeeze a few grains of rice between your fingers. Your rice is done if you feel a slight firmness in the grain.
- If it breaks instantly when pressed, then you have overcooked the rice. Refrain from proceeding with this rice, as you will end up with sticky biryani.
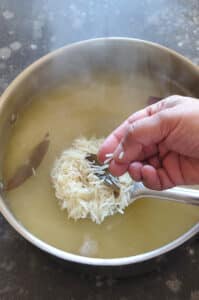
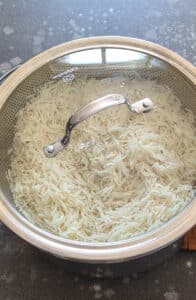
- Once the rice is parboiled, turn the heat off. Remove the rice from the pan and drain it in the strainer. Let the rice stand in the sieve for 2-3 minutes until all the extra water is drained.Tip — Do not cover the rice right away. Let it dry for a few minutes. The rice is now ready for biryani, which needs further cooking.
- Discard the whole spices.
- Replace the cover to keep the rice warm.
COOK THE CHICKEN
- Heat ghee in a heavy-bottomed Dutch oven. Add chicken and cook.

- Cook the chicken pieces for 5-6 minutes over medium heat. You want it mostly cooked. The rest of the cooking will finish in the assembled biryani. Once the cooking time has elapsed, please remove it from the heat and set it aside.

ASSEMBLE BIRYANI
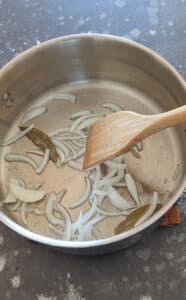
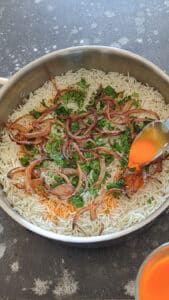
- Time to assemble the chicken biryani. Take a handi or a deep dish pan. Drizzle oil or ghee at its base. Add bay leaves and sliced onions to this pan. Sauté until the onions are translucent.
- Add half-cooked chicken to the pan.

- Layer it with parboiled rice and drizzle a generous amount of ghee over it. Tip — Add a touch of richness. Homemade desi ghee contributes rich flavor and more deliciousness to the recipe; therefore, using it instead of oil or butter is considered healthier.
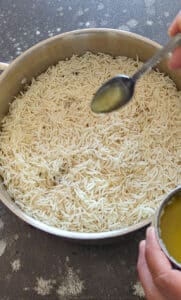
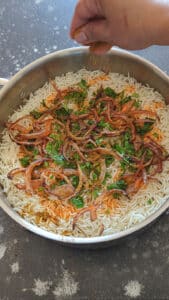
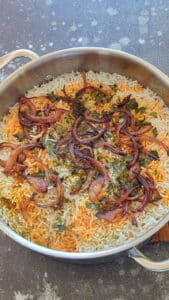
- Layer this delicious biryani with chopped cilantro, mint leaves, and fried onions. Drizzle the saffron milk mixture overtop.
- Finally, add a dash of garam masala. Sprinkle a tablespoon of water and seal the pan.
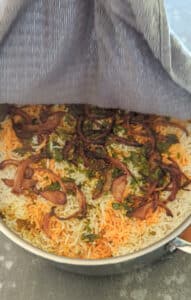
- Cover the pan and seal the cover with a cloth or kneaded dough. Dum, cook for 10-15 minutes until rice is cooked thoroughly and is all fluffy and plump. Tip — The cloth cover adds a little extra seal. It's not quite as good as the dough seal in a traditional biryani, but it will work pretty well.

- Remove the cloth and uncover the pan once the desired cooking time is done.
- Chicken biryani is all ready. Allow it to sit undisturbed in the pan for 5-10 minutes.
- Fluff the cooked biryani with a flat spoon.
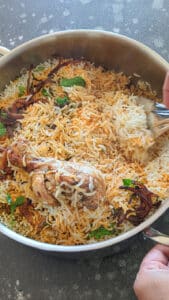
- Garnish with more fried onions and a fresh sprig of mint leaves. Serve hot, along with your favorite raita or chutney.

Video
Notes
Frequently Asked Questions
Is this Chicken Biryani challenging to make? Not really! Though the traditional procedure of cooking Chicken Biryani involves a series of intricate steps and demands attention to detail, I have created precise and easy-to-follow instructions. With the pictorial step-by-step guide provided here, this recipe will help you create the most authentic Chicken Biryani at home with complete ease. Can I double the recipe? Scale the recipe as you desire. This recipe is entirely scalable and can be doubled or tripled according to the requirement. The recipe card helps you with the measurements, so please refer to it. Can I store this Chicken Biryani? Yes, the leftover Chicken Biryani can be stored in the fridge for the next 4 to 5 days. You can even make a big batch to serve later, as it is a perfect make-ahead recipe. However, ensure it has cooled completely before you transfer it to the airtight container for storage. Reheating is simple. Transfer the portion you wish to eat to a microwavable dish and sprinkle some water and ½ a teaspoon of oil over it. Now, heat the biryani in 1-minute intervals in the microwave until warmed through. Depending on the serving size, you may have to heat it a little longer. Is this Chicken Biryani a freezer-friendly dish? Yes, this incredibly delicious Chicken Biryani freezes well for a month or two. The best way to freeze the biryani is to use airtight containers. The flavor and the texture remain intact through this duration. However, if left for a longer time, you might notice a slight change in the taste. The biryani may not taste just as good. How do I reheat Chicken Biryani? When it is time to enjoy your frozen biryani, you must know how to thaw and reheat it properly so as not to destroy the taste or texture. Frozen biryani can be reheated after being thawed in the fridge or over the countertop. Remember to reheat only a portion you will eat and not any more, as you cannot freeze the leftover biryani for the second time after reheating. Can I Make chicken Biryani ahead of time? You can prepare this irresistibly delicious Chicken Biryani in advance and serve it to your family and friends later, as this is an excellent make-ahead recipe. So, the next time you plan a party or get-together at home, make this delicious Chicken Biryani and store it in the refrigerator. It stays perfect for 4 to 5 days under refrigeration. What can I serve alongside Chicken Biryani? Chicken Biryani is a one-pot complete meal on its own and does not require anything on the side. However, boondi raita, green chutney, and vinegar onions can be enjoyed as accompaniments to this mouth-watering dish.Nutrition
Calories: 582kcal | Carbohydrates: 56g | Protein: 19g | Fat: 31g | Saturated Fat: 6g | Polyunsaturated Fat: 6g | Monounsaturated Fat: 15g | Trans Fat: 0.1g | Cholesterol: 69mg | Sodium: 940mg | Potassium: 706mg | Fiber: 4g | Sugar: 5g | Vitamin A: 477IU | Vitamin C: 12mg | Calcium: 111mg | Iron: 3mg